Have you tried kefir before? It’s commonly found at the grocery store, usually shelved near the yogurt, and store-bought kefir often tastes like a thin, drinkable yogurt. But homemade kefir is a different experience altogether: richer, tangier, and more complex in flavor and texture.
When you research kefir online you’ll read many enthusiastic claims about its benefits. Kefir is a fermented milk beverage packed with beneficial microbes. While many commercial kefir products contain around six to seven probiotic strains, homemade kefir made with active kefir grains can develop a broader community of microbes—often many more strains—giving it a different nutritional profile and flavor.
The essential first step is to obtain milk kefir grains. These are live cultures that resemble small, gelatinous granules and act as the starter for making kefir. Once you have grains, the process is straightforward and forgiving. If you have experience with sourdough starters, the idea is similar: you feed and maintain a living culture that produces a fermented food.
To begin, rehydrate your kefir grains if they arrive dehydrated by soaking them in fresh milk for a short period following the supplier’s instructions. After rehydration the grains will begin producing kefir. To make a batch, place the grains in a clean glass jar (avoid metal utensils and containers, as they can react with the cultures). Add one to two cups of milk—many people start with one cup and increase to two as their grains grow. Cover the jar loosely with a coffee filter, paper towel, or breathable lid to keep out dust while allowing gases to escape, and leave it on the counter to ferment. Fermentation time depends on room temperature and the strength of your grains; check the kefir after 12 hours and expect it to take anywhere from 12 to 24 hours. In a warm spot, like near a heating vent, fermentation will complete faster and the kefir will thicken sooner.
When the milk thickens and you notice some separation (a clearer liquid whey at the bottom is normal), gently stir and strain the mixture to separate the grains from the finished kefir. Return the grains to a jar with fresh milk to start the next batch immediately, or store them in the refrigerator in milk if you won’t be fermenting again right away. Many people reuse the same jar a few times before washing it; just be sure containers are clean and free of strong odors.
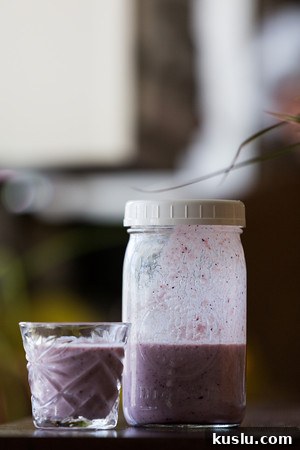
Homemade kefir can be enjoyed plain, sweetened, or flavored. To make a fruity version, add frozen berries and a touch of sweetener such as agave nectar or honey, then puree with an immersion blender. For a blueberry kefir, blend some frozen blueberries with a little agave, then strain and stir the kefir into the purée for a smooth, flavorful result. For a simple plain kefir, a small amount of sweetener and a splash of vanilla extract brighten the flavor without overwhelming the natural tang.
Don’t expect homemade kefir to taste exactly like the commercial varieties; they are different. Store-bought kefir is often milder and more uniform, while homemade kefir carries a lively, slightly effervescent yeastiness and a scent that may remind you of bread dough with a gentle sour note. The texture can range from pourable to creamy, depending on milk type and fermentation time.
If you’re curious, give it a try. Making kefir at home is simple, adaptable, and economical once you have a starter. While not every health claim you read about kefir will be verified, many people who include homemade kefir in their diet report enjoying its taste and feeling positive effects on digestion and overall well-being. Experiment with milk types, fermentation times, and flavorings until you find the balance that suits your palate.