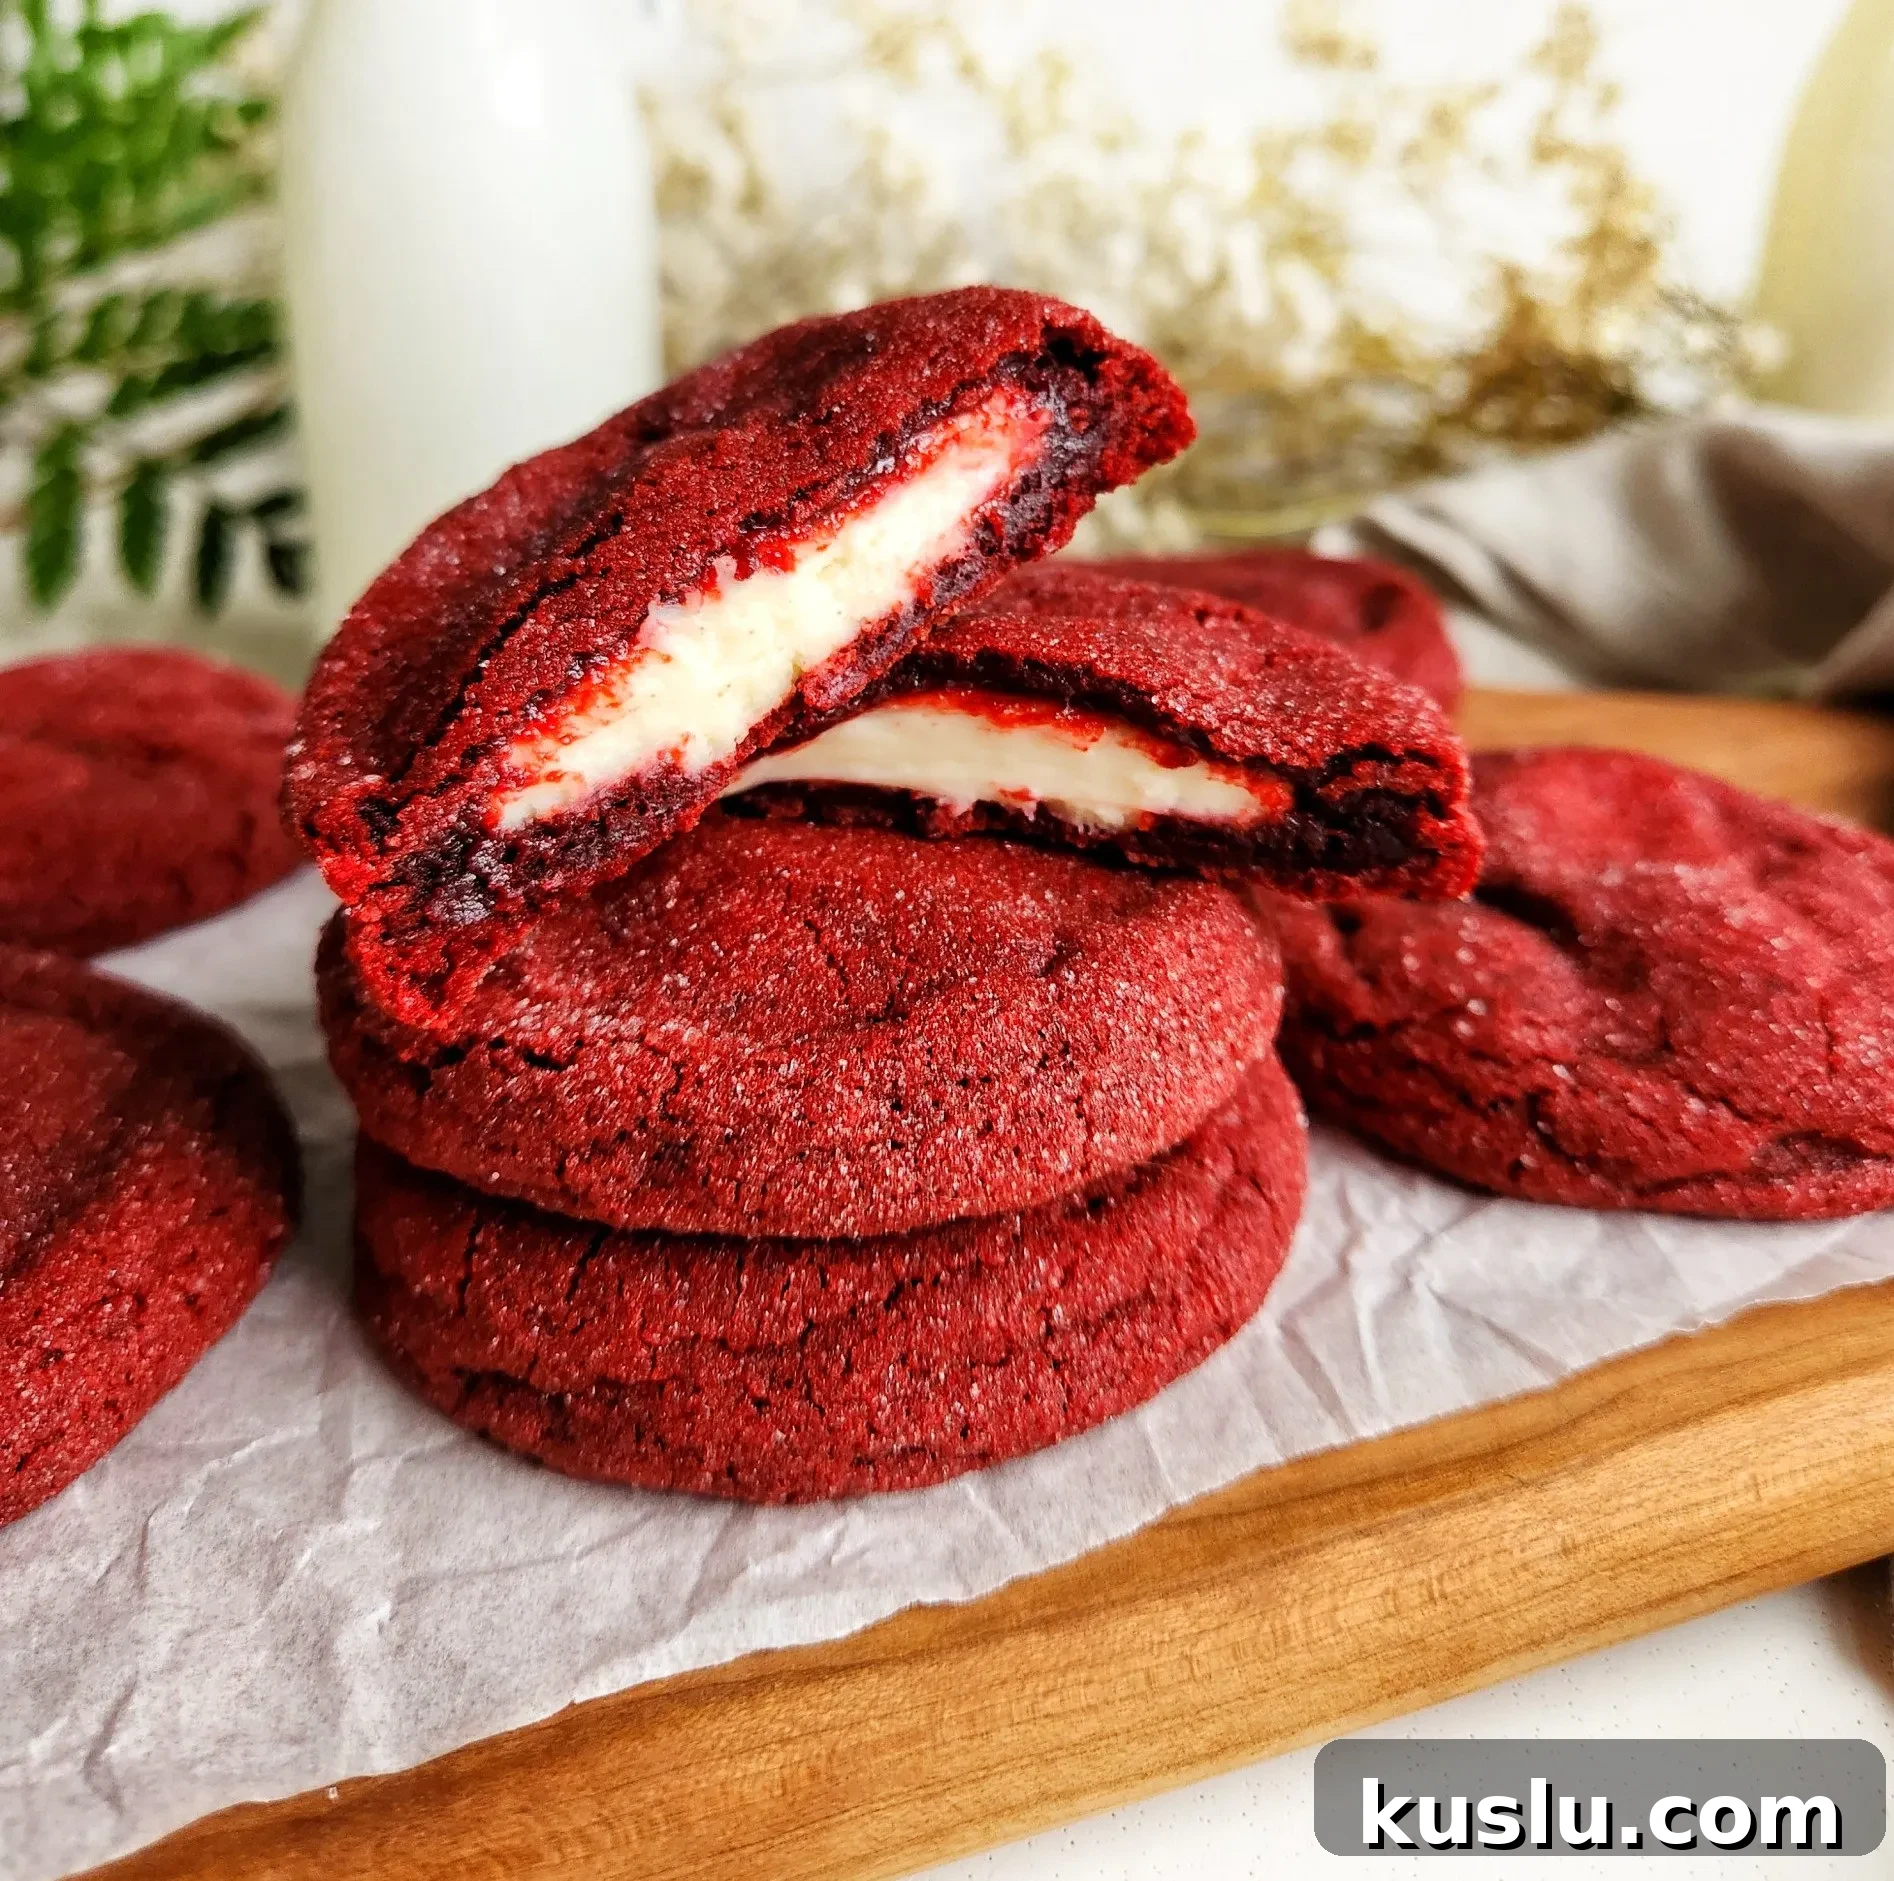
These cheesecake-stuffed red velvet cookies combine a tender, chewy red velvet cookie with a creamy, lightly sweetened cream cheese center. They bake up with slightly crisp edges and a soft, decadent middle—perfect for holidays, gifts, or whenever you need a special treat.
WHY YOU’LL LOVE THEM
Perfect texture. These cookies are chewy with lightly crisp edges and a soft interior that complements the creamy filling.
Creamy cheesecake filling. The filling is smooth and not overly sweet, balancing the cocoa and tang of the red velvet dough.
Simple method. Despite their impressive appearance, these cookies are straightforward to make using basic baking techniques.
INGREDIENTS
- Butter – salted butter at room temperature.
- Brown sugar – adds chewiness and depth of flavor.
- White sugar – used in the dough and for rolling.
- Vanilla extract – enhances the overall flavor.
- Eggs – one large egg plus one extra yolk for richness.
- Red food colouring – amount may vary by brand; add to achieve desired hue.
- Flour – all-purpose flour, spooned and levelled for accurate measurement.
- Cocoa powder – unsweetened cocoa for the classic red velvet taste.
- Baking soda & baking powder – leavening for texture.
- Salt – balances sweetness.
- Cream cheese – full-fat, softened for the cheesecake filling.
STEP BY STEP INSTRUCTIONS
Cheesecake Filling
Line a small baking sheet with parchment paper to prepare the filling portions.
In a medium bowl, add 3/4 cup full-fat cream cheese (softened), 2 tablespoons white sugar, and 1/2 teaspoon vanilla extract. Using an electric mixer on medium speed, beat until the mixture is smooth and creamy, scraping the bowl as needed.
Scoop or measure 18 portions of filling, about 1.5 teaspoons each, and place them on the prepared baking sheet. Freeze the cheesecake portions until solid. Keeping the filling frozen makes it much easier to enclose in the cookie dough without melting.
Red Velvet Cookies
Preheat the oven to 350°F (175°C) and line baking sheets with parchment paper.
In a large bowl or stand mixer, cream together 3/4 cup salted butter, 1 cup brown sugar, and 1/2 cup white sugar until light and fluffy—about 4 minutes. Properly creamed butter and sugar help give the cookies structure and chew.
Add the egg and extra egg yolk, then mix in 2 teaspoons vanilla extract, 1 tablespoon buttermilk (or 1 tablespoon milk + 1/4 teaspoon white vinegar as a substitute), and approximately 1 tablespoon red food colouring. Beat until fully combined and uniform in color.
In a separate bowl, whisk together 2 cups all-purpose flour (spooned and levelled), 1/4 cup unsweetened cocoa powder, 1/2 teaspoon baking soda, 1/2 teaspoon baking powder, and 1/4 teaspoon salt. Gradually add the dry ingredients to the wet batter and mix until just combined. Avoid overmixing to keep the cookies tender.
Assembling the Cookies
Portion about 3 tablespoons of dough per cookie. Roll each portion into a ball, then flatten it into a disc large enough to wrap around a frozen cheesecake ball. Place a frozen cheesecake portion in the center, wrap the dough around it completely, and roll into a smooth ball so the filling is fully enclosed.
Roll each filled ball in 1/4 cup white sugar, then place them on the lined baking sheet about 2 inches apart. If the cheesecake filling begins to soften while you work, return those portions to the freezer between batches to keep them firm.
Bake for about 13 minutes, or until the bottoms are golden brown. The cookies will be puffy when they come out of the oven but will settle as they cool. Allow cookies to cool completely on the pan to room temperature before transferring to a cooling rack or storage container.
FREQUENTLY ASKED QUESTIONS
WHAT DOES SPOONED AND LEVELLED FLOUR MEAN?
Spoon flour into your measuring cup and level it off with the back of a knife. Don’t scoop directly with the cup, which compresses the flour and can lead to using too much, resulting in denser baked goods.
CAN I SUBSTITUTE THE BUTTERMILK?
Yes. If you don’t have buttermilk, use 1 tablespoon regular milk plus 1/4 teaspoon white vinegar. Let it sit for a minute before adding to the batter to mimic buttermilk’s acidity.
STORING THE COOKIES
Store fully cooled cookies in an airtight container in the refrigerator. They keep well for up to four days. For longer storage, freeze individual cookies wrapped tightly and thaw in the fridge before serving.
HOW TO GET PERFECTLY ROUND COOKIES
Right after removing the cookies from the oven, place a slightly larger round cutter or the rim of a glass around each cookie and gently rotate to smooth the edges. This helps achieve a uniform, round shape.
CAN I MAKE THE COOKIES SMALLER?
These cookies are designed large enough to hold the cheesecake filling. Making them significantly smaller risks the filling leaking out or the finished cookie being unbalanced.
If you try this recipe, please leave a star rating and a comment—feedback helps others discover and enjoy the cookies.
YOU MIGHT ALSO LOVE
- Red Velvet Cookies
- Red Velvet Brownies
- Oreo Red Velvet Cookies
- Red Velvet Brownie Bites
- Yield: 18 large cookies
- Prep time: 30 minutes (plus freezing time for filling)
- Cook time: 13 minutes per batch
- Course: Dessert
- Cuisine: American/Canadian
Cheesecake Filling Ingredients
- 3/4 cup full-fat cream cheese, at room temperature
- 2 tbsp white sugar
- 1/2 tsp vanilla extract
Red Velvet Cookie Ingredients
- 3/4 cup salted butter, softened
- 1 cup brown sugar
- 1/2 cup white sugar
- 1 large egg + 1 egg yolk
- 1 tbsp buttermilk (or 1 tbsp milk + 1/4 tsp vinegar)
- 2 tsp vanilla extract
- 1 tbsp red food colouring (adjust as needed)
- 2 cups all-purpose flour, spooned and levelled
- 1/4 cup unsweetened cocoa powder
- 1/2 tsp baking soda
- 1/2 tsp baking powder
- 1/4 tsp salt
- 1/4 cup white sugar (for rolling)
Notes
Spooned and levelled flour means you spoon flour into the measuring cup and level it off with a knife instead of scooping directly from the bag. This yields a more accurate measurement and better texture in baked goods.